Showing posts with label clippings. Show all posts

Tuesday, March 23, 2021

The Liverpool Three

 Hello friends,

Thought I would share a fun project using another of the new Paper Dolls GROUPS.

As I thumbed though the pack of Backdrops 2, I spotted a vintage map of Liverpool.  I loved the colors of the orange and blue together and knew I had found the catalyst for the project.  Next I went to the bag of Paper Doll Groups and picked these three young men I could see working at the docks.  Of course here they are on their day off!  Well lets get started so I can explain more of the details!

I started with the small Vignette Tray as my substrate. It was the prefect size for the three young men.  I covered the outside of the tray, including the lip edge, with Backdrop paper that looks like an old piece of crackled wood.  On the inside, I added the Liverpool map making sure I centered the word, Liverpool, at the center top.  Once the tray was fully covered with paper, I painting a thin layer of Collage Medium over the top to seal the surface.

Backdrops are smaller than the paper we have produced in the past so I did not have enough of the crackle paper left to cover the entire back of the tray.  That was not a problem as I just chose a couple other papers from the pack to cover the back.  The Backdrops work together so seamlessly, crackle can go with typography which goes with pattern.  It's just that simple.
The next step is to add the shelf. I used one of the Eclectic Elements Pinked trim pieces since they can be easily cut to size with Tonic Scissors. I cut the trim piece and glued it into the tray with Collage Medium, leaving it to dry for while I worked on the Paper Dolls and some of the metals.  Once it was dry, I added a strip of the same crackle paper that I used on the outside of the tray.  I brushed Collage Medium over the top of the paper to seal so I could use my Walnut Stain Distress Crayon (with a damp paint brush) over the the surface - especially in the corners.  I also took a little bit of Speckled Egg Distress Paint on my finger tip and ran it along the pinked edge so the blue paint would skip along the surface.
You might be asking how I knew where to glue the shelf?  Well I placed the Tin Top (the thing with the star on the front) into the bottom of the tray.  I knew the shelf had to be just above the Tin Top - just that easy.
I wanted to add the wood Number Block 3 to the right side using the new Hook Clasp.  The Hook Clasp is the same one that I used as the closure on my Shrine project in my last post.  I added an eye screw to both the top of the Vignette Tray and the Wood Block. The eye screws are easy to twist into place if you start with a pilot hole made with an awl. 
I colored some string with Walnut Stain Distress Ink and dried it with my heat tool.  The string was looped through the eye screw then evened up.
I had previously glued a Hitch Fastener to the left side of the tray.  Once it is was secure, I was able to wrap the string around the Hitch Fastener and secure it with Collage Medium on the backside.  Once it's set, it's not going anywhere.
The new Paper Doll Groups have some wonderful characters to work with.  The three boys were colored with Distress Crayons.  I only colored one of boys suits - obviously it's the suit on the right.  I used the Chipped Sapphire Distress Crayon directly on the suit, then rubbed it with my finger till I could see the details of the coat.  The flowers were colored using a dry Water Brush (I like how the stiff bristles of the Water Brush move damp crayon onto the Paper Doll surface).  The Paper Doll Group was added to the tray with small wood blocks to give them the needed height over the string that runs behind them.
I grunged up some Mini Sprocket Gears with paint and Alcohol Ink and added them beneath the feet of the group. The string is just some cheesecloth I added to mimic straw.
For the bottom portion of the tray, I created a grungy bottle using Distress Crackle Paint Clear Rock Candy.  To do that, coat the Corked Vial with Collage Medium and let it dry.  Rub Distress Crackle Paint over the surface and let that dry.  Drip Mushroom Alcohol Ink over the Crackle Paint to color the bottle.
I also added Remnant Rub numbers to a Metallic Sticker and a bug to the tiny tag.
To complete the bottle, I rubbed some paint into the recessed portion of a Machinery Head and added it the top of the cork.
On the right side of the lower section, I added the Tin Top, Mini Flair and two of the new Industrial Gears. Both the Tin Top and the Industrial Gears have a wood block behind them for support. I used a small amount of shredded cheesecloth to disguise the wood block that sits right behind the center of the gears. I bet you can't even see it. I just glued the block in place, then added the gears with more Collage Medium to the Tin Top and wood block.  Once set, the Collage Medium holds everything like cement (those gears are not going anywhere).

I liked the idea of an industrial handle at the top of the tray.  I used paint and Alcohol ink, Distress Crayons to grunge up the handle and the added Hardware Heads.  Once glued with Collage Medium, I kept the tray in a standing position until it was set.
As you can see this tray is easy to create.  You just need to include some drying time to add the Hitch Fastener, the shelf and the Industrial Gears.  Other than that, it moves along quite easily.
Thanks for stopping by to read my post...I really appreciate it!

Now carry on,
paula


Wednesday, February 22, 2017

A Time of Wonder

Hi all!
Hope you have had a productive week!  It is still raining here in California (something we haven't said in a long time around here).  The hills are as green as they have ever been and our "drinking water" Lake Cachuma has risen from an all time low of 8% to 41.2% as of today.   Now I know this because my husband sends me (and a few other people who asked) a "lake totals" text every morning.  I admit it has been fun seeing the lake total go up this week!
(photo taken last week on Highway 166

Well on to today's Plexiglass project.  This one really is limitless in what you can do.  I ordered 2 pieces of 8 x 10" plexiglass (ebay) then sandwiched the paper ephemera between the plexi.  I slipped the plexiglass into an Adjustable Easel to make a great home decor piece!
You can see I used Memoranda Paper Stash for the background piece then layered other ephemera from the Collector pack (blue receipt), Paper Dolls (people), the Botanical pack (flowers + corsage).  The corsage was larger piece and I just clipped off two of the flowers to make it fit on her coat lapel.
Tinting was done with Distress Markers, Faded Jeans, Victorian Velvet, Aged Mahogany and tiny bit of Fossilized Amber.  I love this Paper Doll image because she is so fun to tint...that plaid coat and the hat are my favorite!
The Snippets pack (all tiny ephemera) included the 15 cents ephemera piece that I stapled to the top of the blue receipt (yes, I did add Crazing Medium).
Clippings were used to add the number 175 by the feet and the saying, "a time of wonders" at the top.  Because I could not add actual depth to the paper elements (like foam squares), I tried my best to give it 'visual depth' by folding the blue receipt card then sanding and inking the lines to make it look like an old folded piece of paper.  I also ripped and bent the edges and sanded the flat parts.
The Transparent Tile number five was added to represent the boys age. 
Once my design was complete, I added it to the Plexiglass.  I used a self healing mat board (that I work on everyday to protect my desktop) to make sure the the paper was straight on the plexi, then added the top piece to sandwich the artwork. 
Once they are together - hold on tight so it does not move!  Then add the Design Tape of choice around the edge of the two pieces (it might seem hard but it was quite easy).  After the two pieces were secure, I used the Blending Tool and Walnut Stain Distress Ink to age the tape.
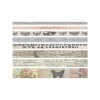
Just a little side note on Design Tape...I got a few emails about how I store it.  I am currently using a plastic case I purchased at Michaels called a 'Divided Storage Bin' that has a flip-top lid. The case allows for removal of the plastic dividers which create the absolutely perfect space for each of the Design Tape sets (each set has 7 different tapes).  I also used a label maker to add the names so I could keep track of what I use the most.
 
Well I sure hope you take a chance with today's project.  Its an easy one and better yet, when you get tired of something you made, the tape can be easily removed and the artwork changed out.  The Adjustable Frame is perfect for display and making your artwork seem much more 'elevated' shall we say? (no pun intended, lol).
Now carry on,
paula