
I'm so thrilled to finally share a project I've been working on – a wall pocket with a vintage-inspired twist! The idea sparked when I saw the beautiful Neutral Palette fabric. I knew its subtle elegance would be the perfect backdrop to complement my love for all things vintage.
More than just a practical storage solution, this wall pocket has become a little piece of inspiration for me. It's designed to hold some of the things I reach for constantly. But what truly makes it special are the details – the old string, the hanging lace and ribbon, and the charming vintage buttons. Every time I glance at it, I'm reminded of the beauty in these simple, time-worn elements. It's amazing how fabric and a few found objects can create something so inspiring!

The finished size of the wall pocket is approximately 17 x 13", but honestly you can make it whatever size fits your space.
Here are my fabric choices but any combination will work. My front and back are the same, but even that is flexible.
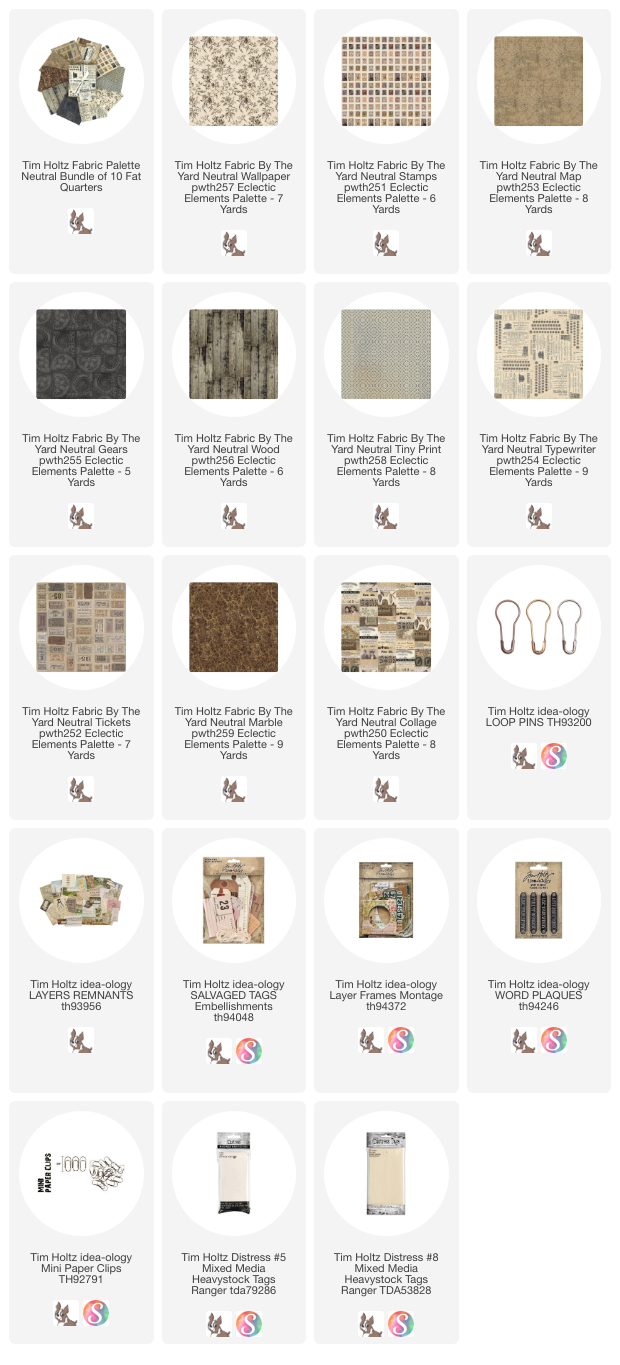
Palette Neutral Wallpaper - front and back (cut 18 x 14")
Palette Neutral Stamps - pocket 1 - cut one 14 x 6"
Palette Neutral Map - pocket 2 - cut one 14 x 6"
Palette Neutral Gears - pocket 3 - cut one 14 x 6"
Palette Neutral Wood - binding - cut two 3" x 44" strips
Palette Neutral Collage - patch
cotton batting - cut one cut 18 x 14" and three 14 x 2 1/2"
Cut two pieces of fabric + cotton batting - 18 x 14". I always cut the backing pieces a little larger than the finished size so the panel can be squared up after quilting.

To start, I drew a line every 1" from top to bottom.
 Once I sewed all the 1" lines, I went back and sewed additional lines using the stitched lines as my guide.
 I love the outcome.


(there are no pen marks on the fabric because I have already ironed over the top to make the pen lines disappear).
 Cut three strips of fabric for the pockets - all are 14 x 6".


And because the pocket are still free to move back and forth, it was easy to add any machine or hand sewing.
 Next, I added some "patches" from the Neutral Collage fabric. Again, I used the glue stick first, then went to the sewing machine.
 I also added the Word Plaque with Button and Carpet thread (thick thread).
 Run a basting stitch (that just means a long stitch length or big stitch) along each side of the panel stitching the pockets into place. *Do not skip this step. It is so much easier to add the binding if you know your pockets are flat and in the correct position.
 Now add the back. I used a Quilt Basting Spray to secure the fabric to the batting before sewing the binding on.
 I picked Palette Neutral Wood for my binding. You will need two 3 x 44" strips sew together to get a strip long enough to go all the way around the panel. Once your pieces are stitched together, iron strip in half so you have a very long 1 1/2" strip of binding.


I'm not going to explain here how to sew the binding on because I am just not that good of a technical writer. There are a million YouTube videos that will show you how to do it (I'm also a visual learner so I need someone to show me, rather than reading how to do it). I suggest this video, "Brilliant Machine Binding Method", because the lady is very calm and explains it well. She shows you four times how to turn the corner, using a simple trick that works every time. When I first wanted to learn the corner trick I made a 10 x 10" quilted panel and used that to practice turning the corners. I also have her video saved on YouTube, so every time I need to do binding I can pop right over and see her do it once or twice then I'm good to go.
 I added grommets at the top for hanging. You might think it scary to add grommets (giant eyelets) but it is actually very easy. I bought my package at Hobby Lobby. It was $1.99 and it came with the tool that you need to set the grommet. You will need to cut a small hole in your project (that might be the only scary part) and you will need a small hammer to pound the two pieces of the grommet together using the tool. There are enough grommets in the package to be able to try one on a scrap piece of fabric/batting just so you can see how easy it is.
 And there you go. Wall pocket is done.


 I hope you love this as much as I do! I just love the Neutral Palette for this project. It brings out the best of all the vintage things I have added.


Now the best part...you get to fill it up!
top right
Ephemera, vintage buttons, metallic string in the pockets.
Dyed ribbon and vintage lace hung from Loop Pins.

top left
More ephemera and vintage lace, #8 tags in the middle pocket on their side.

bottom left
Montage Collage Frames, hand dyed string, and #5 Mixed Media tags.

bottom right
Salvaged Tags and #5 Mixed Media tags.

Now carry on,
paula
LOVE, LOVE, LOVE !!! That palette neutral is totally awesome... You Did It Proud !!
ReplyDelete