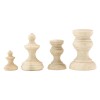
This trio of boxes was enhanced using the new Vignette Finial Set (two sets are needed to complete the trio). The largest set was used with the largest Vignette Box and the smaller finials were used with the remaining two boxes.
Each set was painted with Weathered Wood Distress paint (2 coats). Once dry, I sanded off a bit of paint then added Crazing Medium over the top. Once that was dry, I added Distress Ink with my Blending Tool then sprayed it with water so the ink would run into the cracks that were creating with the Crazing Medium.
When the Finial sets were to my liking, I adhered them to the finished pieces with Collage Medium and let them dry over night.
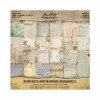
Memoranda paper was adhered to each of the Vignette Boxes with Collage Medium, then a layer of Crazing was added over the top of the paper. Once the Crazing was dry, I added Walnut Stain Distress Ink and a bit of water to fill in the Crazing cracks.
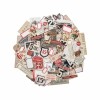
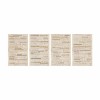
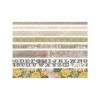
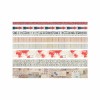
Design Tape Rose and Postal, Clippings, and Ephemera Snippets were added to each box. The Snippets are super tiny pieces of Ephemera (so useful in tight spaces).
Ephemera - Snippets
Design Tape - ROSE
Design Tape - Postal
On the smallest one, I added a Mini Pocket Watch (without the back) and a tiny butterfly from the Snippets pack. The number and the words come from the Clippings Sticker sheet.Well, I hope this weeks Vignette Box posts have given you a reason to try them if you have been putting it off. I think we have just scratched the surface of what can be done with the boxes - so here's to new ideas and definitely more creativity!
Have a great weekend!
Now carry on,
paula





I think you work is absolutely beautiful, and it definitely has encouraged me to have a try at this. Thank you for showing close ups of your work, it really is inspiring! I really am going to be very poor once Tim's new products come out in a couple of weeks, as I have so many projects in mind and this just added to it.
ReplyDeleteI have been admiring these from a distance during some of the Creativation videos, great to see them in close up! Love, love, love, - I just can't wait for these to hit the UK stores!!!
ReplyDeleteThese are just perfect in every way, love the crazing over the top, I just want to reach out and touch them xx
ReplyDeletewaue awsome collecttion love those Vignette Boxes, stunning work
ReplyDeleteYou do the BEST things with those Vignette boxes. I have to tell you that my Christmas Tower is still out. I love it too much to put away.
ReplyDeleteI love all of the projects you made for Creativation. Just gorgeous!
ReplyDeleteSwiping off my keyboard ... from drooling ... these are so awesome love that weathered wood and the tapes, and the finials OMG cannot wait to play with this new stash ! Your projects make me giddy ( you and Emma keep me giddy)... I love the creativeness and the inspiration.
ReplyDeleteOMG! I want these Home Decor for my new home! What a great project !!!
ReplyDeleteHow wonderful to see these up close, the finials add such class to the boxes and you have 'aged' them to perfection. Thank you for sharing the how to for these stunning creations... xx
ReplyDeleteBeautiful!
ReplyDeleteAbsolutely gorgeous Paula, saw these at Creativation and loved them, should have realized they were yours ❤ Deb xo
ReplyDeleteI've already placed my order with new Idea-ology releases and I can't wait to get it! This work is brilliant as always and you know, you are so inspirational for me! Love love love ! BArbara
ReplyDeleteI am most excited about the finials. Using these vignettes in reverse was such a great idea! <3 <3 <3
ReplyDeleteLove the look of these Paula! Your crazing is fabulous, mine never looks like that.
ReplyDeleteLOVE these!!!!!!!!!
ReplyDeleteSo creative. Beautiful
ReplyDelete