Hope you have had a productive week! It is still raining here in California (something we haven't said in a long time around here). The hills are as green as they have ever been and our "drinking water" Lake Cachuma has risen from an all time low of 8% to 41.2% as of today. Now I know this because my husband sends me (and a few other people who asked) a "lake totals" text every morning. I admit it has been fun seeing the lake total go up this week!
(photo taken last week on Highway 166)
Well on to today's Plexiglass project. This one really is limitless in what you can do. I ordered 2 pieces of 8 x 10" plexiglass (ebay) then sandwiched the paper ephemera between the plexi. I slipped the plexiglass into an Adjustable Easel to make a great home decor piece!
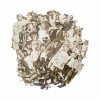
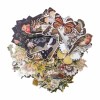
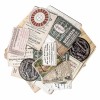
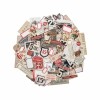
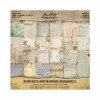
You can see I used Memoranda Paper Stash for the background piece then layered other ephemera from the Collector pack (blue receipt), Paper Dolls (people), the Botanical pack (flowers + corsage). The corsage was larger piece and I just clipped off two of the flowers to make it fit on her coat lapel.
Tinting was done with Distress Markers, Faded Jeans, Victorian Velvet, Aged Mahogany and tiny bit of Fossilized Amber. I love this Paper Doll image because she is so fun to tint...that plaid coat and the hat are my favorite!
The Snippets pack (all tiny ephemera) included the 15 cents ephemera piece that I stapled to the top of the blue receipt (yes, I did add Crazing Medium).
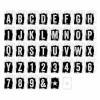
The Transparent Tile number five was added to represent the boys age.
Once my design was complete, I added it to the Plexiglass. I used a self healing mat board (that I work on everyday to protect my desktop) to make sure the the paper was straight on the plexi, then added the top piece to sandwich the artwork.
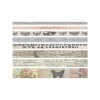
Once they are together - hold on tight so it does not move! Then add the Design Tape of choice around the edge of the two pieces (it might seem hard but it was quite easy). After the two pieces were secure, I used the Blending Tool and Walnut Stain Distress Ink to age the tape.
Just a little side note on Design Tape...I got a few emails about how I store it. I am currently using a plastic case I purchased at Michaels called a 'Divided Storage Bin' that has a flip-top lid. The case allows for removal of the plastic dividers which create the absolutely perfect space for each of the Design Tape sets (each set has 7 different tapes). I also used a label maker to add the names so I could keep track of what I use the most.

Well I sure hope you take a chance with today's project. Its an easy one and better yet, when you get tired of something you made, the tape can be easily removed and the artwork changed out. The Adjustable Frame is perfect for display and making your artwork seem much more 'elevated' shall we say? (no pun intended, lol).
Now carry on,
paula




This is a beautiful piece Paula. What a great design idea!
ReplyDeleteOMG, OMG, OMG ... I LOVE IT !! You never disappoint ... THIS IS WONDERFUL !!!
ReplyDeleteGreat to see this one close-up and appreciate all the wonderful details. Such a HUGE blessing for the rain (your state needs every break it can get). And thanks for the tip on tape storage!
ReplyDeleteThis would make a fabulous class project! Just sayin'!!
ReplyDeleteGORGEOUS project!
ReplyDeleteLove it, Paula! Amazing!
ReplyDeleteFabulous project, Paula!!!!!!!!
ReplyDeleteAs always a sohisticated and wonderful project! Amazing! barbara
ReplyDeleteAbsolutely gorgeous. Love the floating effect with it sandwiched between the plexi. TFS!
ReplyDeleteI am in awe! But then again I am in awe of all YOUR projects!
ReplyDelete