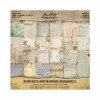
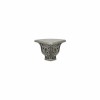
Great to be back today sharing a project made for the Creativation show. I love Vignette Boxes! They have been a staple in my crafting since they were released last year. This past show, we made a conscious effort to show Vignette Boxes used in different ways so people might "think beyond the box" sorta speak. We also have developed some products that will make creating with the boxes even easier, like the new Mini Foundations and Finial Set (which I will talk more about in a future post).
This week I thought I might share a few ways I used the basic Vignette boxes, starting today with a French inspired jewel box.
I used the largest of the Vignette Boxes and the matching Vignette Panel for the lid (sold separately) for the base of the project. I ran multiple pieces of Ranger Metal Foil Tape Sheets through the Vagabond using the Sizzix "Quilted" Texture Fade. If you don't know, Metal Foil Tape Sheets are adhesive-backed thin metal sheets ideal for home décor projects, because they are an easy way to add texture and so forgiving when adhering to the project!
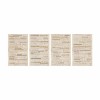
Once I had embossed all the foil, I painted it with Bundled Sage Distress Paint, Gold Alcohol Ink and Blending Solution (Steel Wool was also involved in the process.) If you are going to try it, just give yourself a "test" piece...I cut up a couple of pieces of the embossed foil to test my painting technique before I ever started on the sheets that were meant for the box. The foil is very sticky and goes on easily. A bone folder will help to give you sharp edges and make folds.PLEASE NOTE: all metals and Industrious Stickers have been colored with Gold Metallic Mixative and Mushroom Alcohol Ink.
I cut two heavy chipboard pieces using one of the Sized Ovals - glued them together and then wrapped them in the foil. The oval piece was mounted on top of the large oval from the Industrious Sticker which fits PERFECTLY.
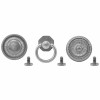
I added the new (and quite wonderful) Mini Hardware knob along with the laurel leaves that is part of the Adornments "Nature" pack.
When you lift the lid, you will find a removable little box inside (the smallest Vignette Box) that has been filled with Memoranda paper and edged with a border sticker from the Industrious Sticker set. The dots were created using a white Uniball pen (undoubtedly my favorite white pen). The fabric covered bottom is linen from the Textile Surfaces pack.
The lid is weighty because I added another Vignette Panel (that is the next size down) to the underside. I did this so the lid will not slide off the box when closed. It is not a perfect fit, but it's close. Floral Memoranda paper was glued to the surface with Collage medium.
Clippings Stickers were added to the underside. I always like the idea of a secret message for the intended receiver. I covered the stickers with Collage Medium and once dry I added shading with my Walnut Stain Distress Crayon.
The last addition was to adhere the new Mini Foundation feet and a lock from the Locket Keys pack with Glossy Accents. I find it best to add the feet and then walk away so you are not tempted to touch them in the drying process.
I hope you liked today's post and that it might open the door to think about Vignette Boxes in a different light. I will be back later in the week to share another take...quite different from this one but just as fun!
now carry on,
paula
now carry on,
paula


