Hi everyone - Busy times around here getting things kitted up for my first holiday classes in Waxahachie, TX. My sister also came for a visit which made for not only some fun times but a HUGE help in getting the kits processed for shipping this week. Please be sure to check the blog side bar to see where I will be teaching this fall!
Today's Halloween project is easy and would make for a great Halloween display. Follow along and I'll show you what I made...
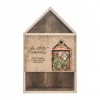
Start by painting the frame and base of the Framed Panel with Black Soot Distress Paint. It will take two coats to make it nice and black.
I chose a skeleton from the Halloween Ephemera pack as a focal point. I cut a piece of chipboard to fit and painted the sides black.
While the chipboard is drying, paint a nice layer of Distress Collage Medium Crazing over the surface of the ephemera. Let this dry for at least an hour or more.
While the Crazing is drying, I cut black cardstock using two Thinlit Halloween dies: Halloween Words -Thin and Twisted Edge. I think the Twisted Edge is already a favorite of many people because I see it being used a lot! As for the Halloween Words, I just cut some of the words and then made up my own phrase for this project. A great way to stretch a seasonal die!!
Add Distress Glitter to the Twisted Edge. Let Dry.
Once the Crazing is dry to the touch you can color it with a multitude of Distress Products...today I'm using Distress Crayons to color the tiny little cracks that the Crazing has left. I scribbled over the surface and (
with a wet fingertip) rubbed the crayon into the cracks. INSTANT aging!!
I wanted to use the new bones (
Boneyard) from the idea-ology Halloween release. These are seriously cool. Where does Tim come up with these product ideas? You know me and my favorite red Eclectic Elements Craft Thread. I can't get enough of this stuff! I decided that since the large bone was the same size as the femur in the ephemera I would sew it right over the image. A little Dr. Frankenstein I know, but I couldn't help myself.
I added the piece of chipboard I previously painted to the back of the ephemera (
see the tiny black edge?). I also added Remnant Rubs (Gothic) to the bottom of the piece. You might think that it would be hard to add Remnant Rubs over Crazing, but it's not. They rub on very easy using the Remnant Rub Tool.
A little more rubs on each side...love the black script adding to the ephemera (
one of my favorite parts of the Halloween Remnant Rubs). Something you won't notice in the photo is that I added a very thin layer of Collage Medium over the Remnant Rubs - this helps to hide the "halo" around the rubs and incorporate them so seamlessly that they appear as one with the paper.
Add a couple Hex Fasteners to the top and bottom of the card. They come in two sizes in the pack - I used the smaller of the two.
Adhere paper from the Materialize Paper Stash to the Framed Panel using Collage Medium. I used the "wood" looking paper and a piece for the bottom that has old advertisements.
To prepare the frame, I randomly painted over the Black Soot with Ripe Persimmon Distress Paint. Once dry, I added glue stick to the dots around the frame so I could adhere gold foil. You have to rub really well but goes on perfectly random, which is exactly what I wanted.
I used Slate and Mushroom Alcohol Ink to color the Word Band (
Incantation). We have never had a Word Band with a number on it before - love this one and it's just perfect for this project. Once the Alcohol Ink was dry I colored in the number. I have a little trick to color in the letters/numbers on any Word Band. If you heat it with your Heat Tool for about 15 seconds, it heats the metal just enough to melt the crayon tip as your are coloring over the letters/numbers. Works every time. Remember to only heat it for 15 seconds so you do not burn yourself on the metal.
Cut some string and add to each end of the Word Band. Use Gathered Twigs Distress Ink to color the string, then add it to the Frame with Glossy Accents.
Now put all the pieces together to create a fun Halloween Panel. I figured the idea-ology wood Coffin box was appropriate for the display since I used the Undertaker Remnant Rub and my phrase,
"Made to Measure".
Another Remnant Rub that is perfect for this project...
"orders attended to day or night"
For the Coffin, I painted it with Distress Stain then rubbed over it with Collage Medium. Once dry, I sanded the edges and inked with Gathered Twigs. The Halloween Word Key was colored with Picket Fence Distress Paint and Mushroom Alcohol Ink. I nailed the key to the coffin lid with a carpet tack (
which coincidentally looks somewhat like a vampire stake from the old Bela Lugosi Dracula movies). Perfect for a great Halloween display!
Halloween is not too far away so I thought I might just have a give away
for some of the idea-ology Halloween product.
To win:
leave a comment and tell me your favorite Halloween candy
I will post the winners name on Friday, Oct 14th!
now carry on,
paula


