Number one reason - It is the nicest time of year on the Central Coast.
Number two - I love Halloween. I think it stems from the fact that my mom always made us Halloween costumes. Seriously, who doesn't like to dress up?
I thought I would start out Oct with a Haloween project I have been waiting all year to do. Read on and I will tell you why.
I used the new Distress Spray Stains to color cheesecloth (it's a Halloween staple). Black Soot, Crushed Olive and Dusty Concord are my colors of choice.
I stared with the Black Soot, spraying over the cheesecloth then adding the other colors over the top. I turned the piece over (since my piece had multiple layers) and repeated the spraying on the back until the cheesecloth was saturated. My piece looked much darker than the camera is capturing here. I dried mine with a heat tool but you can easily let it air dry.
Once dry, you can see the variances in color over the fabric. Again, the camera does not capture the darkness of the cloth here.
I am using two Cabinet Cards for the foundation of the project. They come in a pack of 5 and have different centers - oval, rectangle, etc. I chose two ovals but any shape will work for the project (and they do not need to be matching).
I painted the Cabinet Card Frame with 2 coats of Distress Paint in Black Soot. The middle will be covered so it does not matter if the paint gets on the white center.
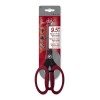
Rough cut one layer of cheesecloth for each frame. Yes, those big red handled Tonic scissors cut the fabric like butter, just saying.
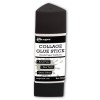
Use a Collage Glue Stick to add a nice thick layer of glue over the black surface. You might ask why I didn't use Multi Medium for this part. One reason - the glue stick does not soak through the cheesecloth like the Multi Medium will, which can leave the cheesecloth with blotchy, very stiff looking spots.
Press into place.
Trim edges,leaving about a 1/8 - 1/4" border edge.
Cut out the center and discard.
Use a Craft Scratcher Tool to fray all the edges.
Stamp the large background image of poison labels from the Stamper Anonymous - Poisonous Stamp Set onto TWO pieces of Specialty Stamping Paper with Archival Ink (must be waterproof).

I did dab up the last remaining wet spots.
And look at the results...
LOVE IT.
Now some cobwebs...I used the Decorative Strip - Cobwebs and a Metal Foil Tape Sheet. The sheets come in two sizes - I picked the 6 x 12" size so I could cut one long strip to fit over the Decorative Strip then ran it through the Vagabond Machine.
Some Mushroom Alcohol Ink to tone down the silver just a bit.
Peel off the backing and lay it over the card.
Now that the basic part of the front of the structure is done, turn the two cards over and lay them next to each other, about 1/8" apart. Use packing tape to secure the two pieces together.

Now the Cabinet Card Frames should stand up.

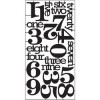
First, cut the number 31 from the Alpha Parts - Numeric sheet. These are black hard plastic, but I need them purple to match glitter. Purple Twilight Alcohol Ink will do the trick.
Once dry, add a THIN coat of Glossy Accents and a layer of Seedless Preserves Distress Glitter. Remember to resist the urge the press the Distress Glitter down! Now just set it aside to dry.
Once dry, the Glitter can be inked with Black Soot Distress Ink on the edges.
Paint a keyhole from the Idea-ology Locket Keys set. Pounce the Tarnished Brass over the surface. Wait for the paint to well up in the recessed parts, then dry with heat tool.
Once dry, pounce Black Distress paint over the raised surface.

I cut them out and hand tinted them with Distress Markers.
So how do you make them look really creepy? How about a skull?
I added a white skull to a Monocle (the Remnant Rubs - Apothecary comes with one black sheet and one white sheet).
Then attached the Monocle to a few links of chain with a Jump Ring at the top. The Jump Ring was opened to allow it to slip over a Hitch Fastener.
I painted the metal with black Distress Paint just to age it a bit.
Then I poked a hole through the Cabinet Card Frame with a Craft Pick to allow the screw bottom of the Hitch Fastener to come through. Can you see it?
Now just screw on the top portion of the hitch. Super easy.
It's like something right out of the Haunted Mansion. Is he dead? or isn't he?
The keyhole and one flower were added to the Frame with Multi Medium.
Left Side:
I cut black cardstock with the Spooktacular Decorative Strip - the PERFECT Halloween font!
Then glittered them with Black Diamond glitter (it's fine black glitter with purple/green mixed in)I adhered the Spooktacular word along with Label Letters that I sanded and inked.
(I did the sanding and inking before I placed the Label Letters on the project)
I added Multi Medium over the Label Letters and the surrounding area. Once it was dry, I went around the edges of each word with a Black Soot Distress Marker, then smudged in the color with my fingertip so the small words would stand out.
That small step makes such a difference.
I put a piece of foam tape under the TOP of each number so the top portion would not slump down into the oval center.
And there you go - a fun Halloween Display!
click on photo to enlarge

I hope this inspires you to start creating your own Halloween display! The basic Cabinet Card Frame structure is so simple and could really be translated to any holiday or theme. So if Halloween is not your thing, then maybe it's Christmas! Plenty of time to get started on either!
Have a great weekend...
Now carry on,
paula


Oh My Goodness! This is the greatest thing ever. The monocle with the remnant rub?! Brilliant.
ReplyDeleteJess
Brilliant! How do you think of these things? The mind of an artist, I guess. Love it, and I' m not even into Halloween very much. :-))
ReplyDeleteWhat a FANTASTIC Halloween project! LOVE the ink effects on the cheesecloth and poison labels. The pinnacle with the skull is genius! :)
ReplyDeletePure genius! LOVE the look of the stained cheesecloth, the sprayed poison label background and the cobwebs draped across, and as for the monocle - that is so incredibly clever!!! So wonderful. Jenny x
ReplyDeleteFabulous project with so many cool techniques! I just got the full set of sprays (happened to be my birthday this month), and so can't wait to play with them. Great inspiration here! Though I do feel sorry for that poor pretty bride....
ReplyDeleteOMG! I just love this one, the skull on the monocle idea is brilliant :-D
ReplyDeleteSally
I can't believe you've "sat" on this idea for 9 months! Love the skull on the monocle! Great Halloween decoration!
ReplyDeleteI LOVE this!!!! And your suggestion of making it Christmas is right up my alley!!! This is a GREAT project!!! WAY COOL!
ReplyDeleteEverything I can say is…Fabulous!!
ReplyDeleteWonderfully spooky!! Love the foil spider web!
ReplyDeleteSo cool and well, a little creepy. I'm in love. The stamped background looks so dimensional. Now I neeeeed some cheese cloth. Thanks!
ReplyDeleteWell this is a whole lot of awesome! It's all kinds of vintage creepy and I love the way you've altered everything with a dark twist. Thanks for the Halloween inspiration. :)
ReplyDeleteI am not a Halloween fan but I LOVE this! Seriously spooky!
ReplyDeleteThis is pretty darn spooky Paula! Love how your mind works!
ReplyDeleteHow fun is this? Just the right amount of spooky for Halloween. I love it!
ReplyDeleteOH MY WAY TOO "Spook-a-licious" LOL !! The creativity, the creativity, the creativity... EVERY detail it so awesomely fun !!
ReplyDeleteOH.MY.GOSH. I freaking love this !!! I am making this for our anniversary ! We love all things skullish ( we drive a pimped up hearse) so this will be amazing !!! LOVE.IT.
ReplyDeleteFabulous Paula, I love all the details and how everything just came together !
ReplyDeleteOh my goodness, once again you have knocked our socks off...this is INCREDIBLE! The techniques and details are awesome!
ReplyDeleteFantastic ! Love the dyed muslin and the hanging element in front of the man is inspirational! Sue C x
ReplyDeleteOh man that is pure halloween I love it thanks for sharing thinking I should get a picture of my sis and her honey. .. she loves halloween!
ReplyDeleteHow very cool!! I love Halloween and my daughter is a big fan of skulls...what a great idea and inspired ghoulish piece.
ReplyDeleteGreat tutorial! Such a cool project and love the colors. The groom (before being "skulled") looks all of 14.
ReplyDeleteFreakin' SPOOKTACULAR! Amazing creation for this frightful season! Love it :)
ReplyDeleteYou are veddy e-ville my friend. Veddy skeddy!
ReplyDeleteLove that background you created and the skull just makes me grin!!!
ReplyDeleteThis is just fab-u-lous Paula, an amazing and spooky Halloween project - love that skull in the monocle.
ReplyDeletePaula,
ReplyDeleteI love how you incorporated everything in this creation. Thanks for sharing.
This is brilliant! Thanks for showing us how you created it!
ReplyDeleteOMG... what do I like more? The monocle? The spider web on foil tape? The funky lettering? I can't decide - so many fabulous elements!
ReplyDeleteVery spooky cool Paula! Reminds me of the Haunted Mansion.
ReplyDeleteTFS!
Love it
ReplyDeleteGhoulishly Fabulous, Paula!!! LOVE the skull monocle!! Sooo dark and delicious!! No wonder you waited to create this macabre wedding picture!! It's sooo Halloween and Dia de los Muertos!! Totally AWESOME!! XOXO-Shari T.
ReplyDeleteWicked Cool Paula Wicked Cool!!! I love the monocle, that was the clincher to the whole piece in my opinion :) Thanks for sharing!!
ReplyDeletewow! very creative!
ReplyDeletePaula, this is just so cool!
ReplyDeleteOh my goodness, this is amazing! I love it! Thanks for the inspiration!! Love ya' Patricia B
ReplyDeleteI love watching you craft! Gorgeous!
ReplyDeletewhat an amazing project Paula...thanks for the fabulous walk through tutorial...hugs xxx
ReplyDeleteThis is just brilliant and really made me chuckle this morning......stunning work! X
ReplyDeleteVery cool - I love this project!
ReplyDeleteLOVE LOVE LOVE this spookilicious make!!!
ReplyDeleteBest Halloween project this season! Love it. See you soon in Waxahachie.
ReplyDeleteDear Paula, you are so freaking amazing! I have been trying to make a Disney Haunted Mansion theme this year and your card fits perfectly. Thank you so much for the tutorial Jan
ReplyDeleteSuch a fabulous project Paula!! LOVE what you did with the monocle, what a great idea.
ReplyDeleteBrilliant Paula, adore how you used the images and the monocle. Tracy x
ReplyDeleteThe best part is the monocle!! I love this, thanks for sharing.
ReplyDeleteOMG! Fabulous! You are brilliant!
ReplyDeletePaula, that is seriously creepy! Wonderful use of all the assorted materials.
ReplyDeleteI do love me some creepy, spooky stuff and this is almost too creepy. But, I still love it. What a cool project. Fabulous job.
ReplyDeleteGreat project, Paula!
ReplyDeleteFabulous project PAula, full of techniques! Stunning as always!!! You are an inspiration for all crafter! BArbarayaya
ReplyDeleteYou're so talented, it's scary! I love this. Every step is awesome. Thanks for sharing your fab ideas :)
ReplyDeleteCor I am so impressed with all those photos and thanks for the step by step, love the end product to bits. I agree with Laura above your talent is scarily fabulous x x
ReplyDeleteWarm crafty hugs from Shirl x x x
ShirlsCards.
Love the groom's two faces. Spooky!
ReplyDeleteWow - really spectacular.
ReplyDeleteTotally AWSOMENESS!
ReplyDeleteThis is wonderful! Thank you for sharing!
ReplyDelete